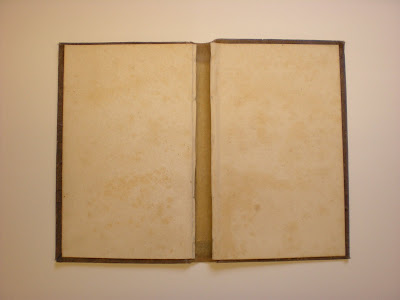
Using a technique that Martha Kearsley taught me, which I believe was conceived of by Don Etherington, I toned tissue until I saw stars, filled losses and repaired the cover to this thin and rare gem. The biggest challenge was toning as the cloth on the spine and cover boards changed in color so drastically.
CAITLYN THOMPSON ORIGINAL BOOKBINDING, BOX MAKING, AND PHOTOGRAPHY
Wednesday, July 20, 2011
Welcome to Haverford College - Treat This, Please.
This summer I am a Conservation Intern at Haverford College. I hit the ground running a few weeks ago and have loved the fast environment. I was worried I wouldn't be able to apply my speedy ways to conservation, but I was wrong. While mending can be slow at times, I find the entire process of treatment exciting and oddly spunky. Never know what attitude a book will throw at me. Studying the objects, planning treatments and being in complete control of execution has been rock solid. Below, I share with you my first project here at the Magill Library in hot and humid Haverford, PA.
Love and Truth, by Luke Howard, a rare Quaker book from Special Collections needed a complete conservation treatment which included washing, de-acidifying, re-sizing, paper mending, re-sewing, rounding, and re-casing. Below are some photos from the epic process.
WASHING
Spalted Maple Wood: A Gothic Binding Story
I fell in love with spalted maple last year. Those gorgeous dark segments are caused by fungi. Rotting wood. Delicious. Click here for more on spalting.
I had a special pen made for my dad which featured spalted maple but never thought I would get a chance to work with the splintery substance myself. Wrong. So wrong.
North Bennet Street School is a great school. A great school with many different departments. Two floors up from bookbinding sits the entire Cabinet and Furniture Making department. Did some awesome dude mention he had scraps of spalted maple for yours truly? Not until I asked him. And bam. My adventure began. The magnificent cabinet and furniture maker cut the scraps down to my specific size and to work I went.
First I had to sew my text block. Double-flexible sewing on thick cords. Sweet. After plowing the edges smooth it was back to the spalted maple boards. Time to bevel the edges. Most folks in my class used oak boards, which they shaped and beveled with rasps and files. Not me. The spalted maple split too easily. The wood needed a delicate touch. Sandpaper on a block. So I perspired a bit and after an hour or two (maybe more) my boards were shaped. Enter Dremel. Holes were drilled, cords were threaded and hammered and wedged. More sanding happened. Yada yada.
Leather time. Most classmates used alum tawed pig skin which I thought would be a little thick for my binding. I also wanted the cords to show through the leather quite prominently. I used alum tawed goat skin which was a bit thinner and stretchier than the pig skin we ordered. On the goat skin went and dried.
The braided kangaroo leather headbands are a wild story summed up short -- I made a total of five headbands. Yes the book only has two. Yeah.
This gothic model is not a historical model. The sewing is accurate but the design is more modern and totally rad. Taste is taste.
I know the explanation might be vague and the commentary a little silly but I can't help it. Even discussing the beauty of spalted maple puts me somewhere else. On a different plane. Made of spalted maple. I love it. And that's fine.
Sunday, June 26, 2011
Devil's Dictionary - Fine Binding #3
The Devil's Dictionary, by Ambrose Bierce. Third fine binding. And I'm pretty proud.
I have had a couple of first quality black leather skins from Harmatan for quite a while. One had a smaller smoother grain which was flawless throughout the skin. I figured something dark and comical would fit this leather well. I used the tudor panel technique that Dominic Riley taught my class (see post - A Tudor Treat for detail) and spelled out DEVILS on the cover with layers of leather. As the front was full of texture I decided the back should show off the almost velvet-feeling leather hence the lack of tooling or design. I solid edge gilt the head to really make the board edges pop and thought an excellent challenge would be to sew completely white head bands. To those who don't know black leather --> the challenge is not smearing the headbands with purplish dust and pasty mess of the leather while covering.
FRONT
BACK
SOLID GOLD EDGE AND WHITE HEADBAND
DETAIL SHOTS WITH DIFFERENT LIGHTING AND ANGLES
Limp Vellum Glory
The first thing my dad asked when he saw this book was "Hmm, is that sturdy?" I don't remember how I responded but my answer to that question is, YES. Vellum is wonderfully strong yet can be rather difficult to work with. My short take on the process -- animal skin soft and wet stretched out so far and thin that the fibers are petrified and harden. Stiff, tough, awesome. I bound Jost Amman's Cuts of Craft-Workers. The book is sewn on alum tawed leather thongs which are weaved through the vellum case, which can be removed and/or replaced if need be. A rough edge gilt the top edge of the book. For rough edge gilding you must mix up all the pages very well and then apply gold solidly to the edge. Once the process is finished and the pages are placed in their original order the edge no longer looks like a brick of gold but instead shimmers gently and subtly. Pretty.
Fancifying Salinger
I so enjoyed my three little pocket book Salinger books, Nine Stories, Franny and Zooey, and Raise High the Roof beam, Carpenters and Seymour: An Introduction. While extravagant in their own right they physically lacked a certain Oomph. Everybody has these tiny books, shredded old copies, new shiny ones from the South Station book store in Boston, hard copies, rare copies. Many copies. I wanted mine to be unique. Fancy and unique.
From tiny fanned glue mass produced books, they were reshaped and reformed to feature round spines, false bands made with laminated strips of leather and vellum, navy leather, gold tooled lines and titling, and marbled paper, which I made myself.
I won't go into the gory details of this structure because the transformation process can vary from book to book. Just know that it is possible to give a simple book a fancy make-over. The only flaw is that I forgot to take before pictures so I had to borrow images from Google to show the pre and post surgery photos.
Please email if you'd like a makeover for any of your beloved books.
BEFORE
AFTER
I know.
Subscribe to:
Posts (Atom)